
DIY Fall Wreath

I create very large wreaths and sometimes find it hard to scale back so when I shop for florals, I choose a large round grapevine wreath and purchase bushels of flowers in groupings. I choose a color palette and work from there. I typically know ahead of time what color I’m going to use and then just let the creativity flow once I get to the store. I start with the largest flower first and then work in the fillers. I like to fill the cart up with the flower stems stuck down in the cart with the flowers staring up at me. This way I can visualize what they will look like as they are spread around the wreath.
If the store is not to busy, I lay the wreath on the floor and drop the flowers around it to help visualize in my mind what I still need and what I need to put back. This also helps to see if the colors work and flow together. Wreaths can get expensive so always hit the sales at Hobby Lobby, JoAnn Fabric, and Micheals. Walmart has some really cute fall and holiday decor which is where I got this scarecrow.

I make all of my own wreaths and floral arrangements and every year, I choose a different color scheme for my spring/summer, fall, and winter wreaths. If the flowers are not faded and look in good shape, I’ll re-use it the following year but add a different color or ribbon. For example, two years ago, I had a fall wreath in which I added deep turquoise flowers in the mix and changed out the ribbon for an animal print that coordinated with the colors of the flowers. I love using large wired ribbon to make a big bow so I always allow room for a bow in the wreaths. I think wired ribbon is easier to work with and the bow holds up better outside.

Step 1:
Find an area in your home that is bright and spacious. If needed, lay out a blanket to work on. The grapevine can scratch surfaces as well as the hard floral stems. Spread out your supplies. I always use a heavy duty wire cutter, scissors, and pipe cleaners. Cut all of the price tags off of the stems. I chose to use my front entry as my crafting location because the dogs love to work with me. Also, make sure you have a bag or garbage can near you. Making florals can get messy!
Step 2:
Lay the largest flowers in a pattern around the wreath. I like to use solids with combinations or two different styles of flowers. Then place your filler stems in between your arrangement. I like to spread out the flowers and bend them to the desired look I want. I am constantly manipulating the florals and intertwining them. I also make sure that when the door opens and shuts, my wreath is not on the way.
Step 3:
Take the largest bushel of flowers and slide the stem in between the vines until it feels secure. With our front door, we do not have a roof, and the direct weather can be brutal. Follow that with your smaller flower or different style flower until you are all the way around the wreath. Intertwine the flower combinations so that they look variegated.
Step 4:
Add your fillers by doing the same thing. Each stem should feel secure in the wreath. Remember, the more you put in your wreath, the heavier it will be.

Step 5:
Make your ribbon! I try and choose something that compliments the wreath and in this case, I chose the lighter ribbon with the turkey pattern. I bought 30 feet of ribbon and used approximately 15 feet to make my bow. I am self taught without any training but I’ll try to explain this the best I can. I do know that if you ask someone at the craft stores, they will help teach you how to make a bow.
I decide on how much ribbon I want to hang or be the “ends” and then twist the ribbon until I can fold more into a loop and then I twist again. I keep twisting and folding making sure that I have enough loops on each side. I work from left to right. I use my pipe cleaners (sometimes you need to twist 2 together depending on how big your bow is) wrap it around the twisted part (which is what you will be holding on to) and twist your pipe cleaner together securing the loops so they don’t fall apart. Then spread out your loops to the desired look you want. My bow had 7 loops on each side and I chose to make it round. Take the ends of the twist tie and secure the bow to your wreath. For some reason, I most always put mine on an angle to the left.
Step 6:
If you are using anything else like a this scarecrow, use your pipe cleaners to twist tie and secure it to your wreath. I chose to use brown pipe cleaners so they wouldn’t stand out.
Step 7:
Hang it on your door and fluff up your wreath. Make sure there are no gaps to be seen and all the flowers are blended together. And your done!!
Some advice: I typically buy more than I think I need just to be safe. If I have anything left over, I either save it for the next year or use it on another project. When buying florals, I try and buy in groups of 3s or 4s depending on how big the grapevine wreath is. For example: If I’m using red flowers and white flowers , I’ll buy 3 bushels of red and 3 of white and then 3 or more of my fillers. This also depends on how big the bushels are. Gauge the size of your door and work accordingly.
Hope you enjoyed my DIY Fall Wreath! If you have any questions, type them in the comments below and don’t forget to share this post!!!


You Might Also Like
What Does Guaranteed Analysis On Pet Food Labels Mean?
Happy Wednesday, everyone! What Does Guaranteed Analysis On Pet Food Labels Mean? When I used AI to generate an answer, it gave me the following short version. I then researched to give you a more detailed description. If you are ever curious about a pet-related...

20 Fascinating Dog Facts
Happy Wednesday, everyone! I thought it would be fun to post these 20 Fascinating Dog Facts and see if you have heard of these before. I hope everyone had a nice Easter and spent time doing something fun. I cooked, and everything went as planned. I made it easy...
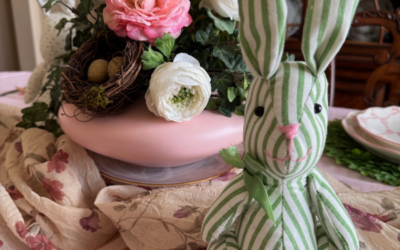
Easter Table 2026
Happy Easter, everyone! I created this Easter Table 2026 to give you some inspiration for some simple ideas and a quick tablescape. I chose these bow plates and green placemats, which are out of stock now, from Hobby Lobby, added a floral arrangement I made years...
Lovely and very festive! Love your four legged helps!
Thank you! Aren’t they the cutest little helpers! When they were puppies, they would dive into the flowers. Now they just hang out and watch.
Very pretty! ????
Thank you!!
Great tips on creating a beautiful fall wreath! I love that your perfectly behaved dogs were there giving you their expert opinion! Lol… Fantastic job by all!
Awh, lol Thank you! They are with me everywhere I go! They even follow me when I vacuum! Glad you liked the wreath. I’m self taught so I tried to be as detailed as I could without making you all crazy. haa haa